How to Make A "Nu Disco" Track Without Sample Packs
Learn how to build a nu disco track from scratch — drum programming, chord voicing, basslines, and mixing tips.
August 21th, 2026
Learning how to make a nu disco track without sample packs starts with one decision: build the groove from an instrument you can direct instead of searching folders for loops.
What Is Nu Disco?
Nu disco is a modern take on late-70s and early-80s disco, filtered through house, funk, and boogie influences.Nu disco often draws on older drum machine and studio references, yet its low end still needs sufficient control and impact for a current club system. Finding that balance is one of the first drum decisions to make.
Building the Groove First
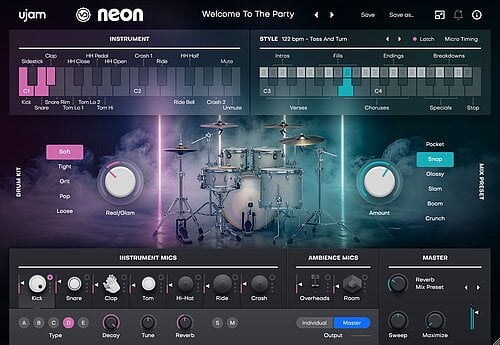
That balance becomes slow when each drum comes from a different folder and each pattern has to be assembled one note at a time. UJAM Virtual Drummer NEON addresses that exact issue with tempo-organized Styles, recorded performances, selectable kits, and phrase-based song parts, letting this tutorial start with NEON's rhythm and timing choices.
So let’s break down the whole process (...which really only takes about four steps).
Step 1: Build the Drums
Nu disco has a retro-style sonic aesthetic, which often means less fidelity and low-end impact than we associate with current drum hits, especially kicks.
It still needs to hit hard on a current sound system and dance floor. That can be a difficult line to toe.
NEON combines acoustic kits with the presence associated with electronic drums. That balance suits nu disco without relying on a folder of unrelated loops.
You spend less time second-guessing whether the sounds will move the dance floor.
PRO TIP: Audition NEON Styles at the actual project tempo with Latch enabled. A relaxed phrase can feel rushed after a large tempo change, even when it remains synchronized. Set the tempo first, then choose the performance you want to develop.
Start With The Kick
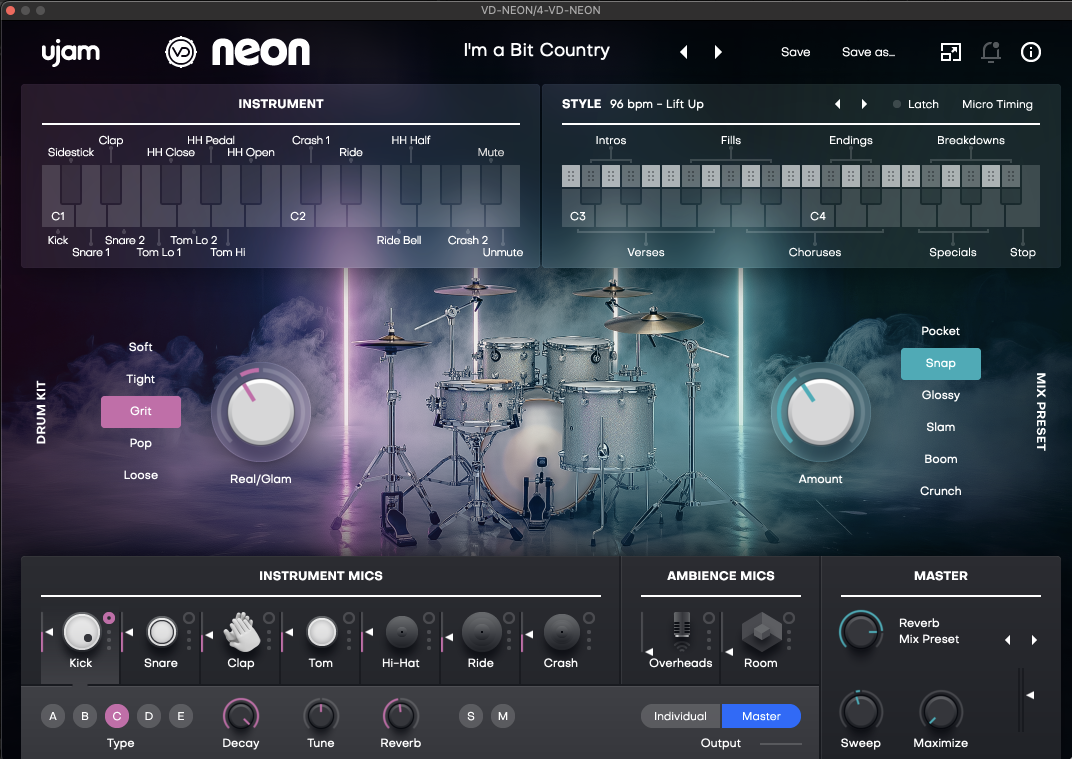
The drums carry most of the identity in this production, so this first step deserves the largest share of the work. Start at 114 to 118 BPM with a kick on each quarter note.
Then Comes The Backbeat
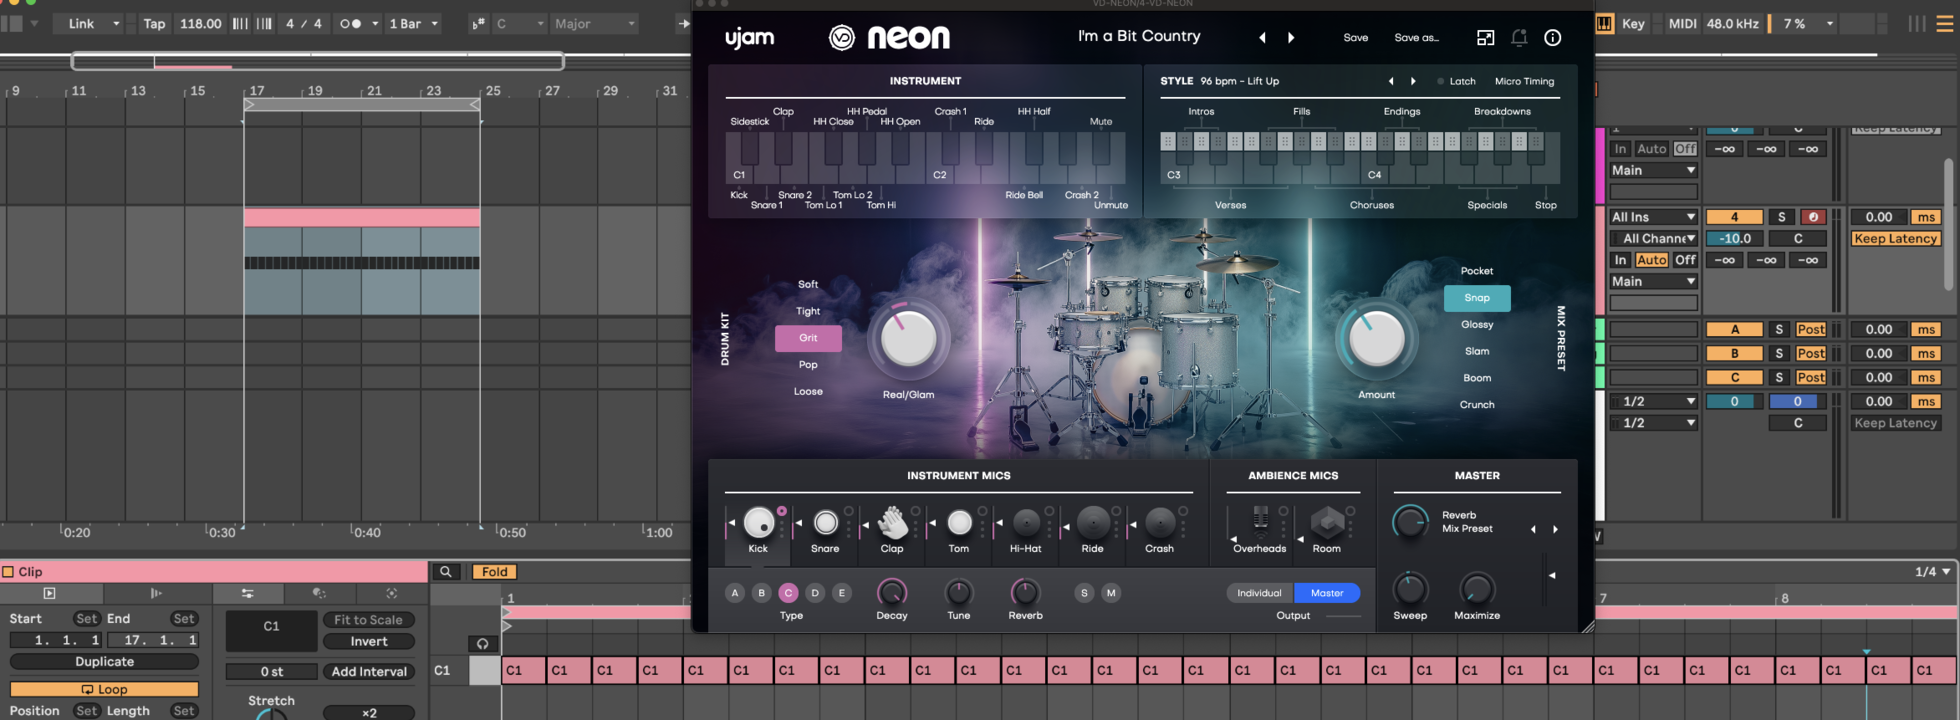
Next comes the snare.
In most dance genres, it falls on counts two and four, as shown in the image below.
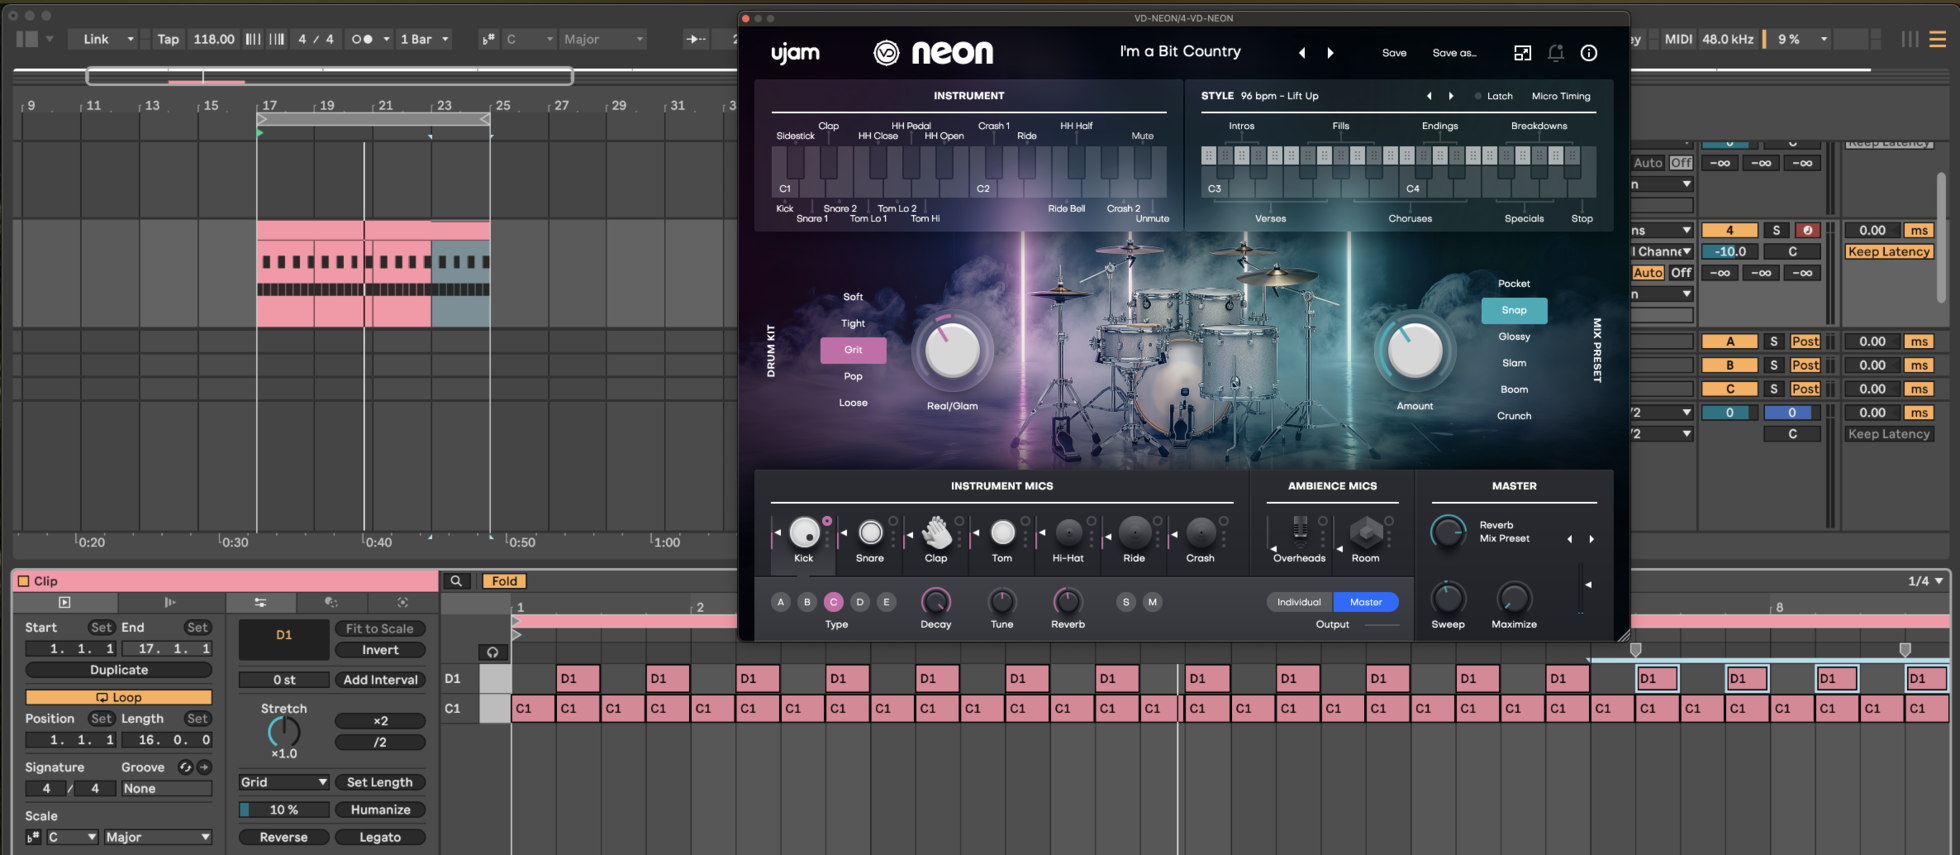
Snare choice can define the production.
When picking a snare, look for enough character to define the track as clearly as a lead synth or vocal.
The snare in this example has enough body and crispness to remain audible in a dense arrangement.
Is it perfect right this second? No. The next steps provide several ways to fit it into the mix.
Wrap It All Up With Some Hats
The hi-hat pattern can supply controlled syncopation around that disco foundation. It is also where we can add variation to keep a basic four-on-the-floor pattern interesting across the full song.
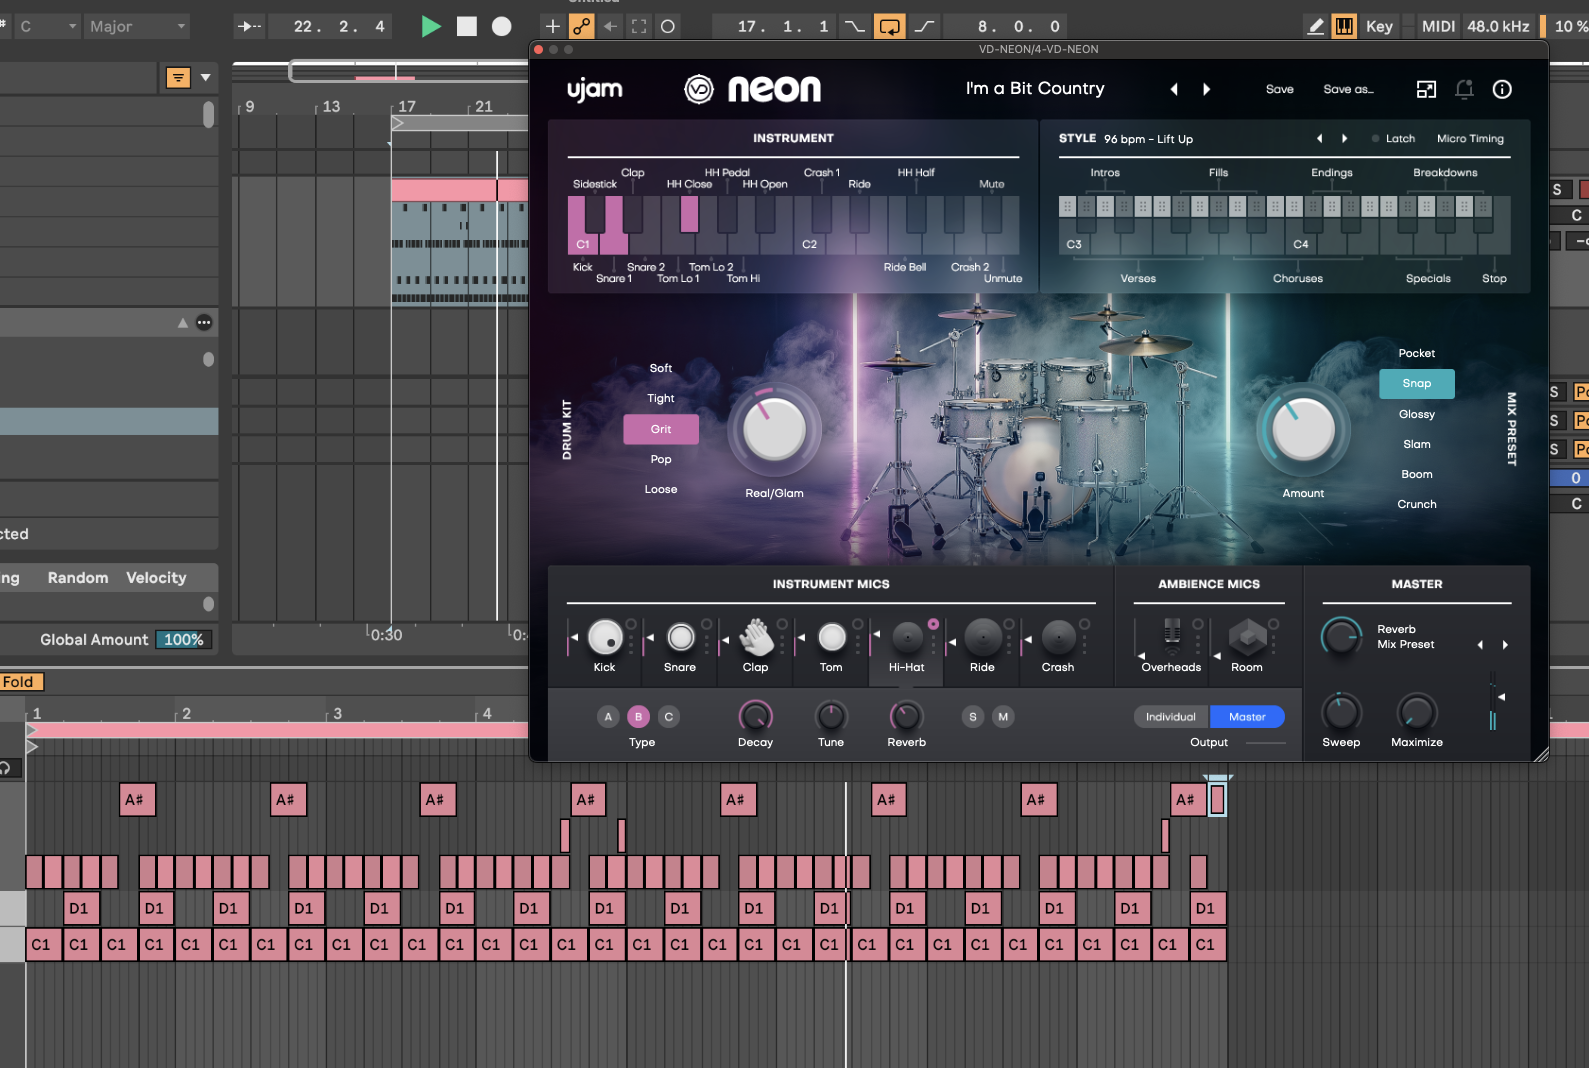
First, look at the note velocities. Notice how the level of each hit changes across the loop? This small adjustment reflects how a human drummer plays.
It also emphasizes selected notes, helping the drums move forward without adding more “stuff” to the mix.
Next, look at the open hi-hat and shuffled closed hi-hat at the end of every fourth bar. Those events extend the loop. Without them, the main drum pattern would repeat after a much shorter interval.
The open hat and shuffled ending carry the idea across four bars, so each pass feels less repetitive.
PRO TIP: Enable Latch when turning the programmed loop into a performance-led arrangement. Use NEON’s white-key phrases for repeating sections and black-key phrases for temporary changes. Move upward within the Verse or Chorus range to introduce busier variations while retaining the same performance style.
That Can’t Be It Can It?!
If you wanted, you could continue adding percussion layers inside NEON, but remember that the drums underpin music that has yet to be written.
We have a foundation to write to, and here it might just be best to push the idea forward with chords and a bassline, then return to the extra percussion when those additions can actually respond to the music we are about to write.
Step 2: Add a Chord Progression That Leaves Rhythmic Space
Nu disco can support many harmonic approaches, so this progression is one workable direction for the track. The eight-bar MIDI clip centers on F# minor and uses F#m, Bm/F#, E, and A. In F# natural minor, those chords read as i, iv, VII, and III.
The short eighth-note attacks in the image above are as important as the chord order.
Keep the voicings close between changes and reuse common notes where possible. Move the remaining voices by a small interval. Leave a gap before a fill so the drums can mark the transition without another chord attack covering it.
For a laid-back and sultry version, load a Rhodes-style patch in Usynth DELUXE and hold each voicing for half a bar or a full bar. F#m7 and Bm7 can replace the basic minor chords. Add sevenths or ninths where they support the melody.
Choose a slower response and modest Ambience, then add gentle tremolo if the sustained chords need movement.
Fewer chord attacks leave the detailed rhythmic activity to NEON.
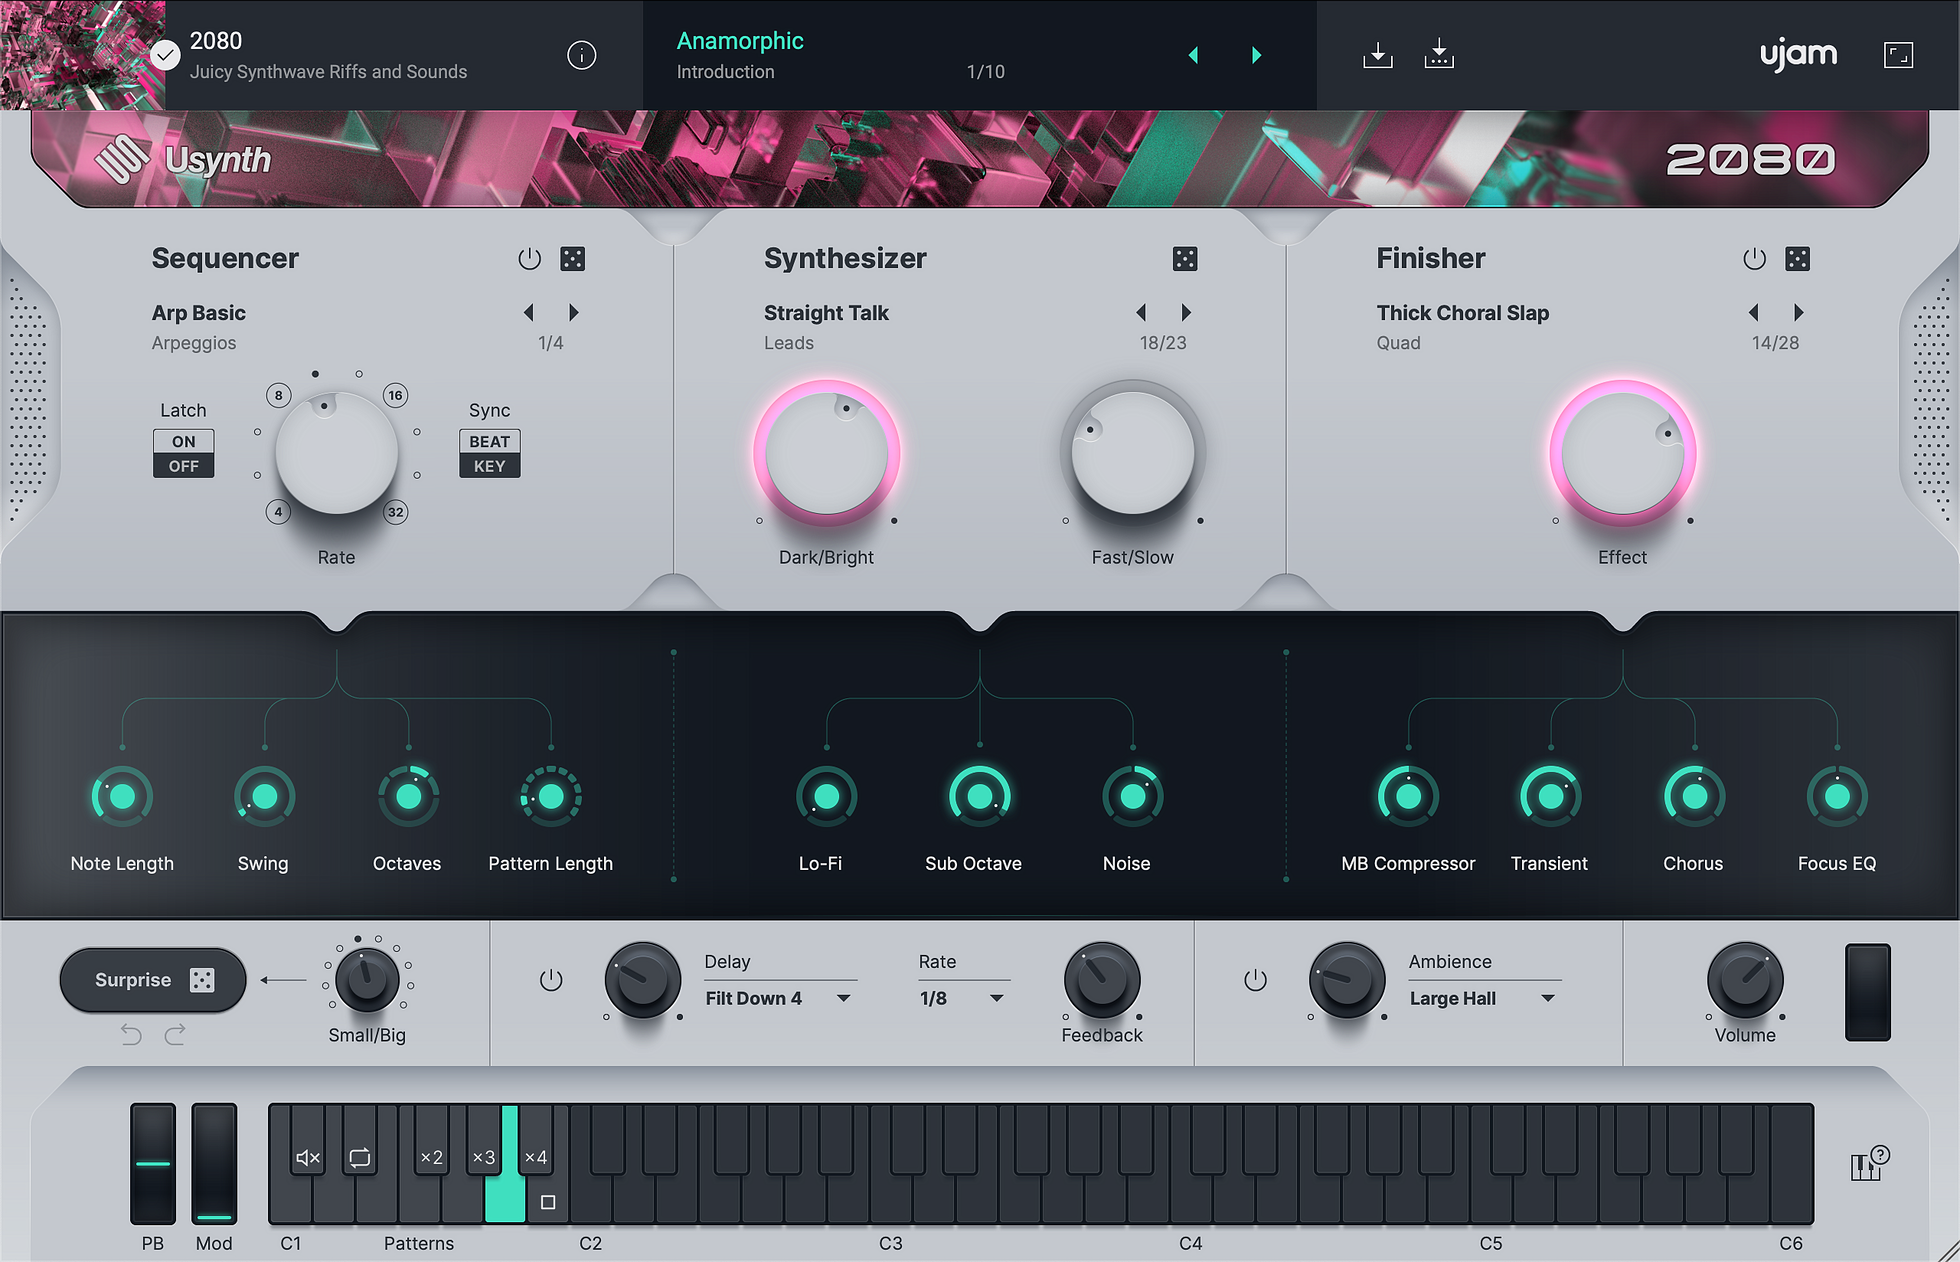
For a brighter and more energetic version, keep the short MIDI pattern and load a bright poly patch in Usynth 2080. Turn its Sequencer off so the existing MIDI clip controls the chord rhythm.
Move Fast/Slow toward the faster side so each chord ends before the next attack. Use Dark/Bright to bring out the upper notes. Keep Ambiance modest, then choose a Finisher mode with chorus when the voicings need added width.
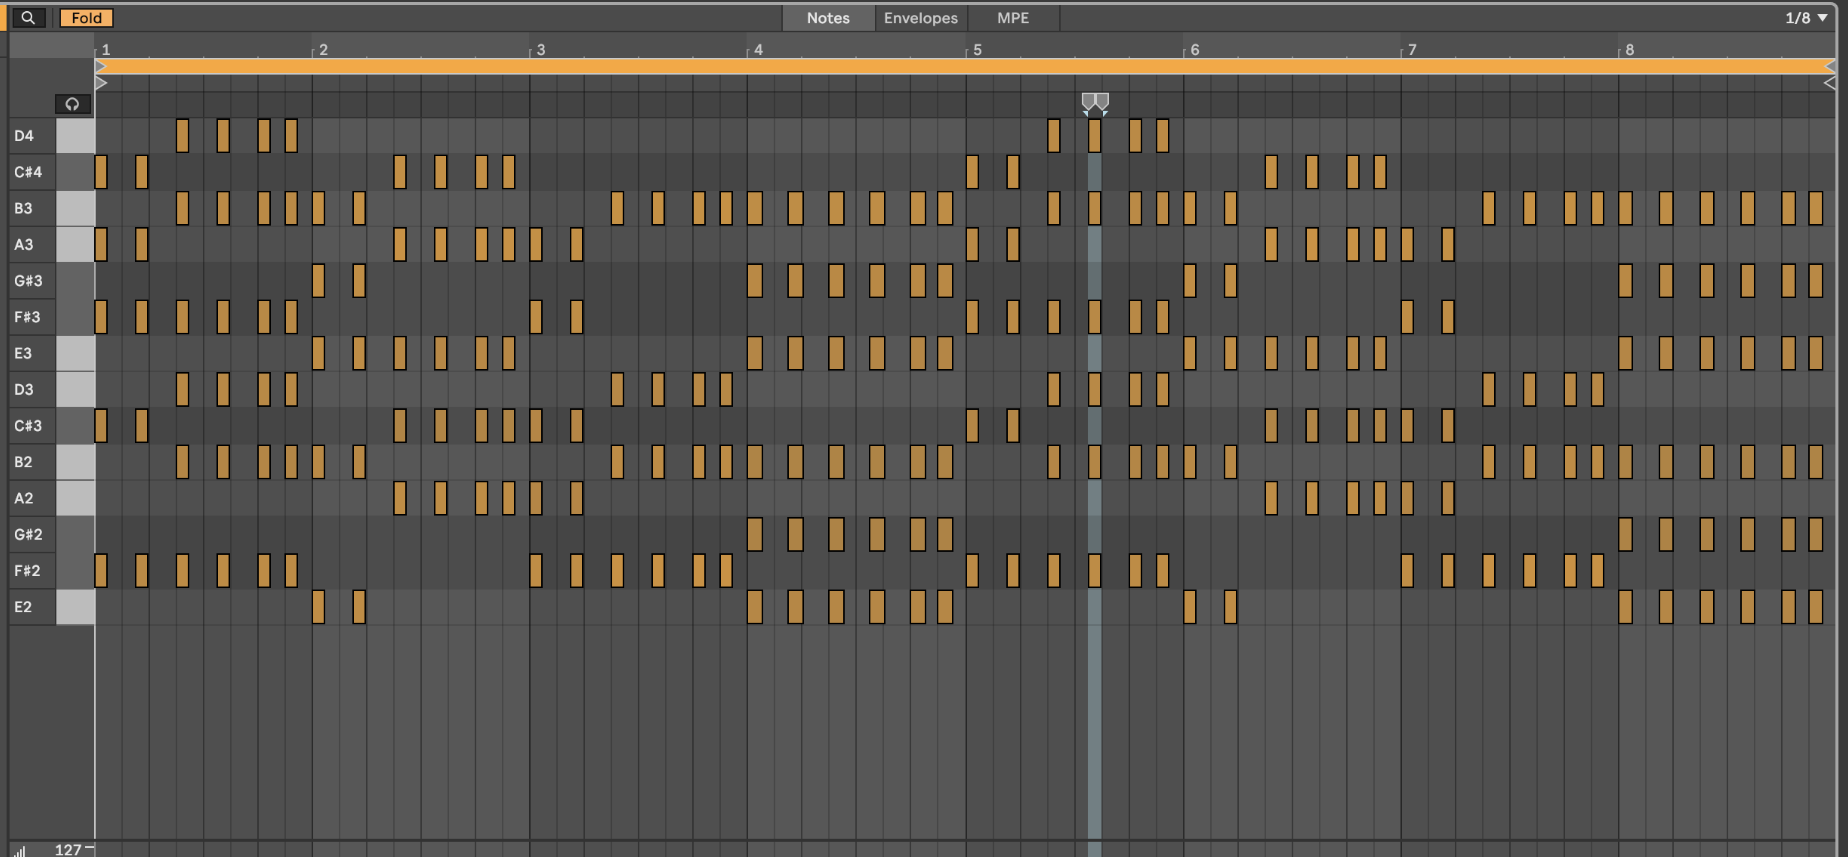
This gives the chords a plucky, groovy feel while preserving room for the kick and bass, and predictability in the chord progression at the end of the loop gives a bit more room for the bass fills and passing notes to pop through without overloading the listener with multiple melodic turnarounds all at once.
Choose the instrument before finalizing the chord rhythm.
Rhodes suits fewer attacks and longer notes, while a Juno patch can support the denser eighth-note pattern shown here. The chord order can remain the same, with note length and voicing position setting the energy of each section.
Step 3: Write the Bassline Against the Kick
Build the bass from the chord roots before adding passing notes.
Place the first root with the kick at the opening of each bar. Answer later kick notes with shorter notes between the primary counts. This creates interaction with the drum pattern without copying every kick event.
Keep those additions limited, because the seventh chords already supply harmonic information above the bass.
Now return to NEON and adjust the Micro Timing controls while the bass plays. If the bass feels late against the drums, move NEON slightly toward Push before shifting every bass note. If the hats feel rushed, reduce Swing first, then check Humanize. This plugin-level adjustment preserves the recorded relationships inside the phrase and can solve the issue with one control.
Return to NEON and adjust the Micro Timing controls while the bass plays. If the bass feels late relative to the drums, move NEON slightly toward Push before moving each bass note.
PRO TIP: Send NEON’s kick and snare to dedicated DAW channels when either part needs separate EQ or sidechain routing. The phrase engine continues controlling the performance. Each drum can then receive its own processing in the mix.
Return to the Drums: Tune and Expand the Arrangement
Many final drum decisions are difficult to judge while the kit plays alone. Once the chords and bassline are in place, check whether the kick competes with the low end and whether the snare pitch fits the track.
Then listen for spaces where added percussion could enter.
Start by tuning the individual drums against the harmonic content. Add selective accents to give repeated phrases some rhythmic variation. A pre-programmed top loop can add hi-hat or percussion movement without replacing the main NEON performance.
Let’s look at each adjustment in context.
Drum Tuning
Listen to the two audio examples below to hear where the mix currently sits. Once the chords and bassline are playing, revisit the pitch and envelope of each drum. Treat the initial NEON settings as a starting point.
Strictly speaking, tuning adjusts pitch. Decay and sustain control how long each hit occupies space. Treat these parameters as connected decisions so the kit fits the harmonic content and the project tempo.
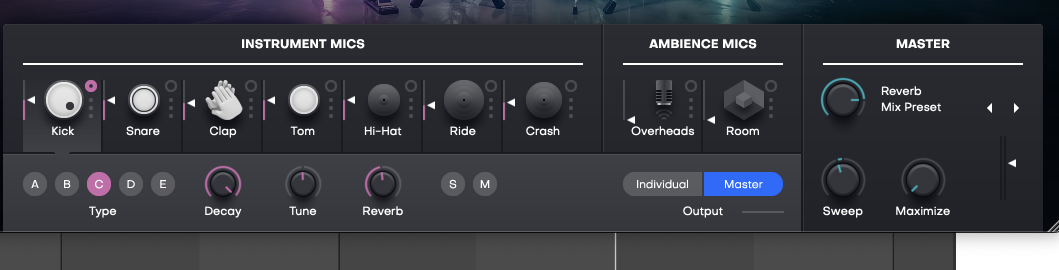
Pitch adjustments can help the main kick and snare sit naturally beside the chords and bassline. Apply the same check to any toms. Envelope adjustments address timing at the sample level.
Shortening the kick can stop it from overlapping the next bass note. Reducing the decay of a snare or hi-hat can create space before the next hit.
Listen to the updated mix below.
The kick pitch has been lowered so it sits closer to the bassline. The snare pitch has also been lowered, and its decay has been shortened.
The lower pitch gives the snare added body. The shorter envelope places greater emphasis on the initial transient. The hi-hats have been pitched lower for a warmer tone, and the reduced decay makes each hit end sooner.
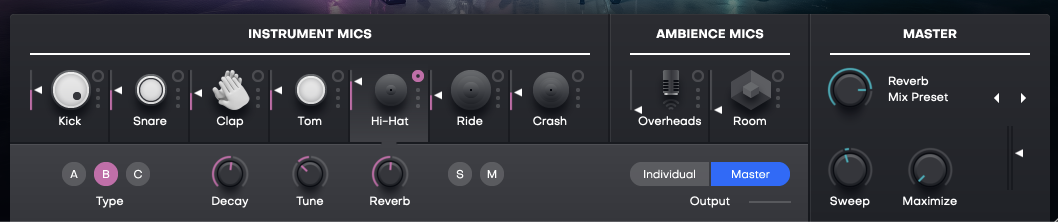
The hi-hat envelope has a large effect on the groove because it sets the silence between repeated hits. When each hat ends at the right point, the pattern feels tighter. The gaps between notes also become easier to hear.
This stops the drum group from feeling sluggish and gives a laid-back, sultry pattern steady forward motion.
A Full Drum Arrangement
Once the full rhythm and chord parts play together, natural gaps become apparent across the pattern. Use those spaces to introduce NEON’s remaining drum voices with a specific purpose.
A clap can reinforce selected snare hits. Toms can answer the bassline near the end of a phrase. Each addition should respond to an existing part.
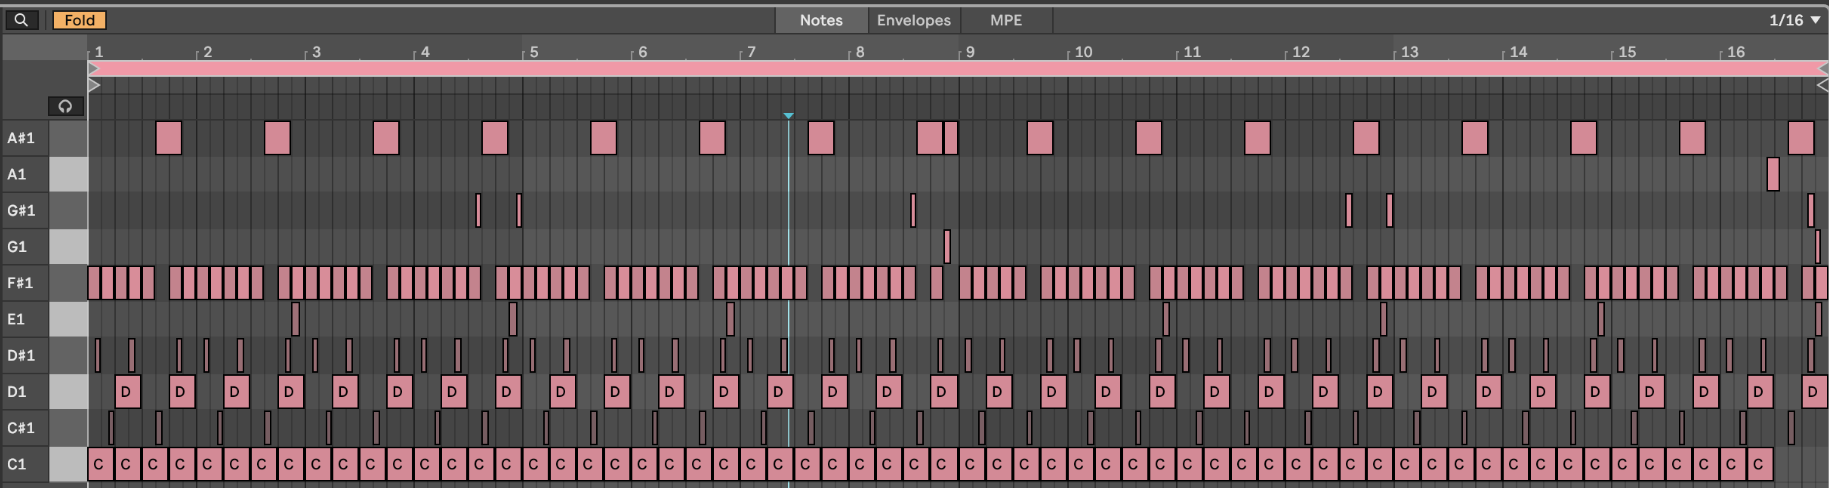
Duplicate the original eight-bar section to create a 16-bar cycle.
Add a small variation at the end of every second bar. Make each fourth-bar boundary slightly busier.
During the closing bar of the second pass, remove the kick and add a short tom fill. Bar 16 now provides the larger transition. The smaller edits mark the earlier phrase boundaries. Changes to the chords and bass, as well as the filter settings and NEON phrases, can shape the overall arrangement.
You do not need to rebuild the drums for every section and that’s the biggest thing to focus on here! The recurring pattern remains recognizable, while the dropouts and fills prevent each pass from feeling identical.
The Last Bit of Sizzle
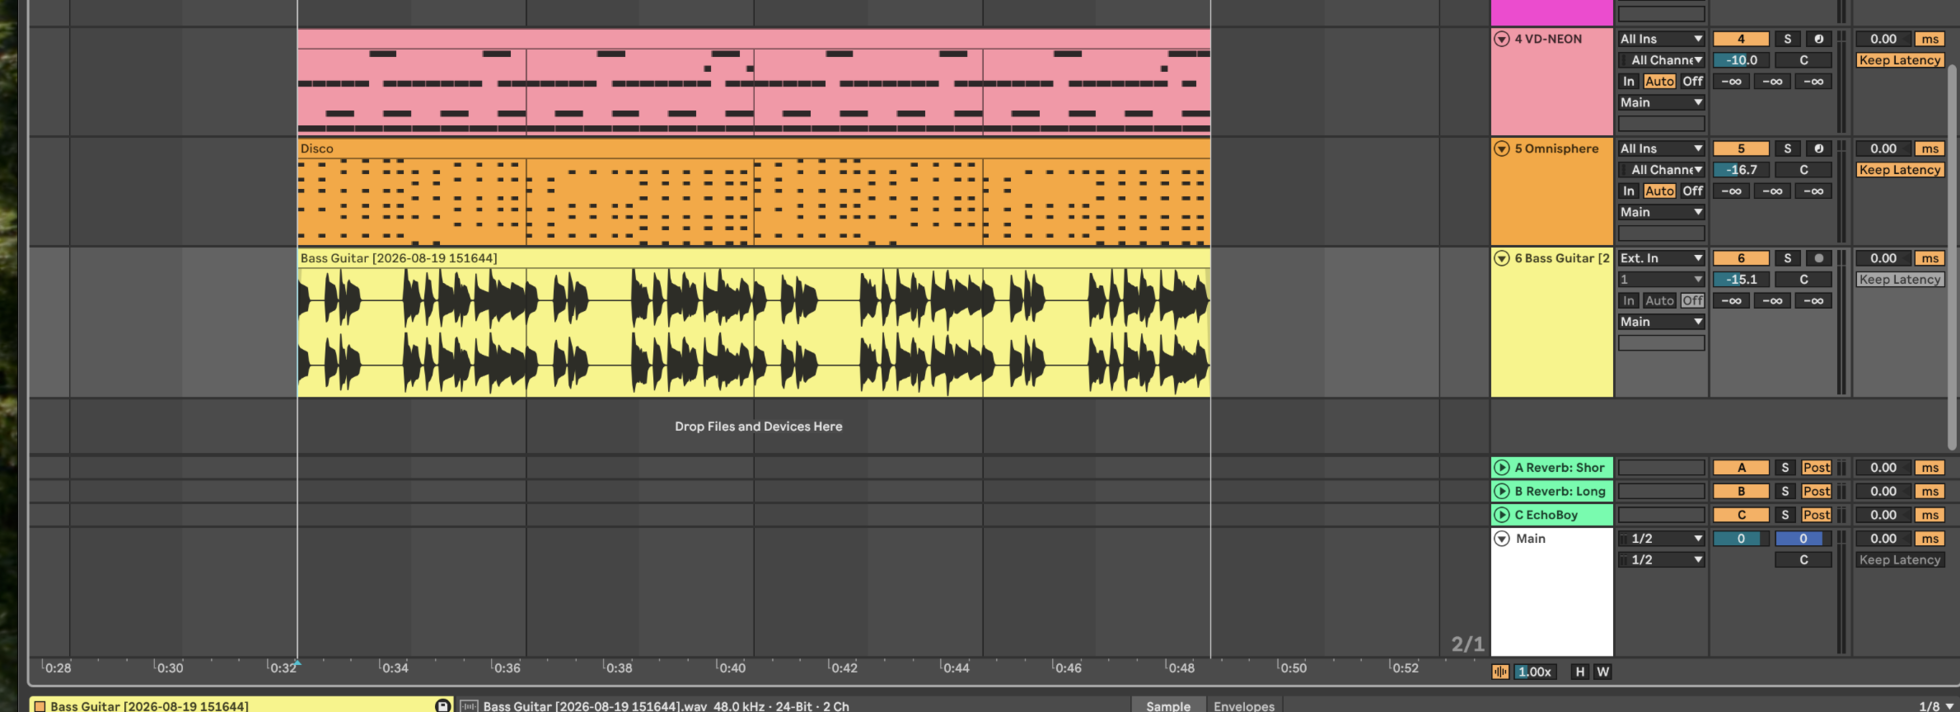
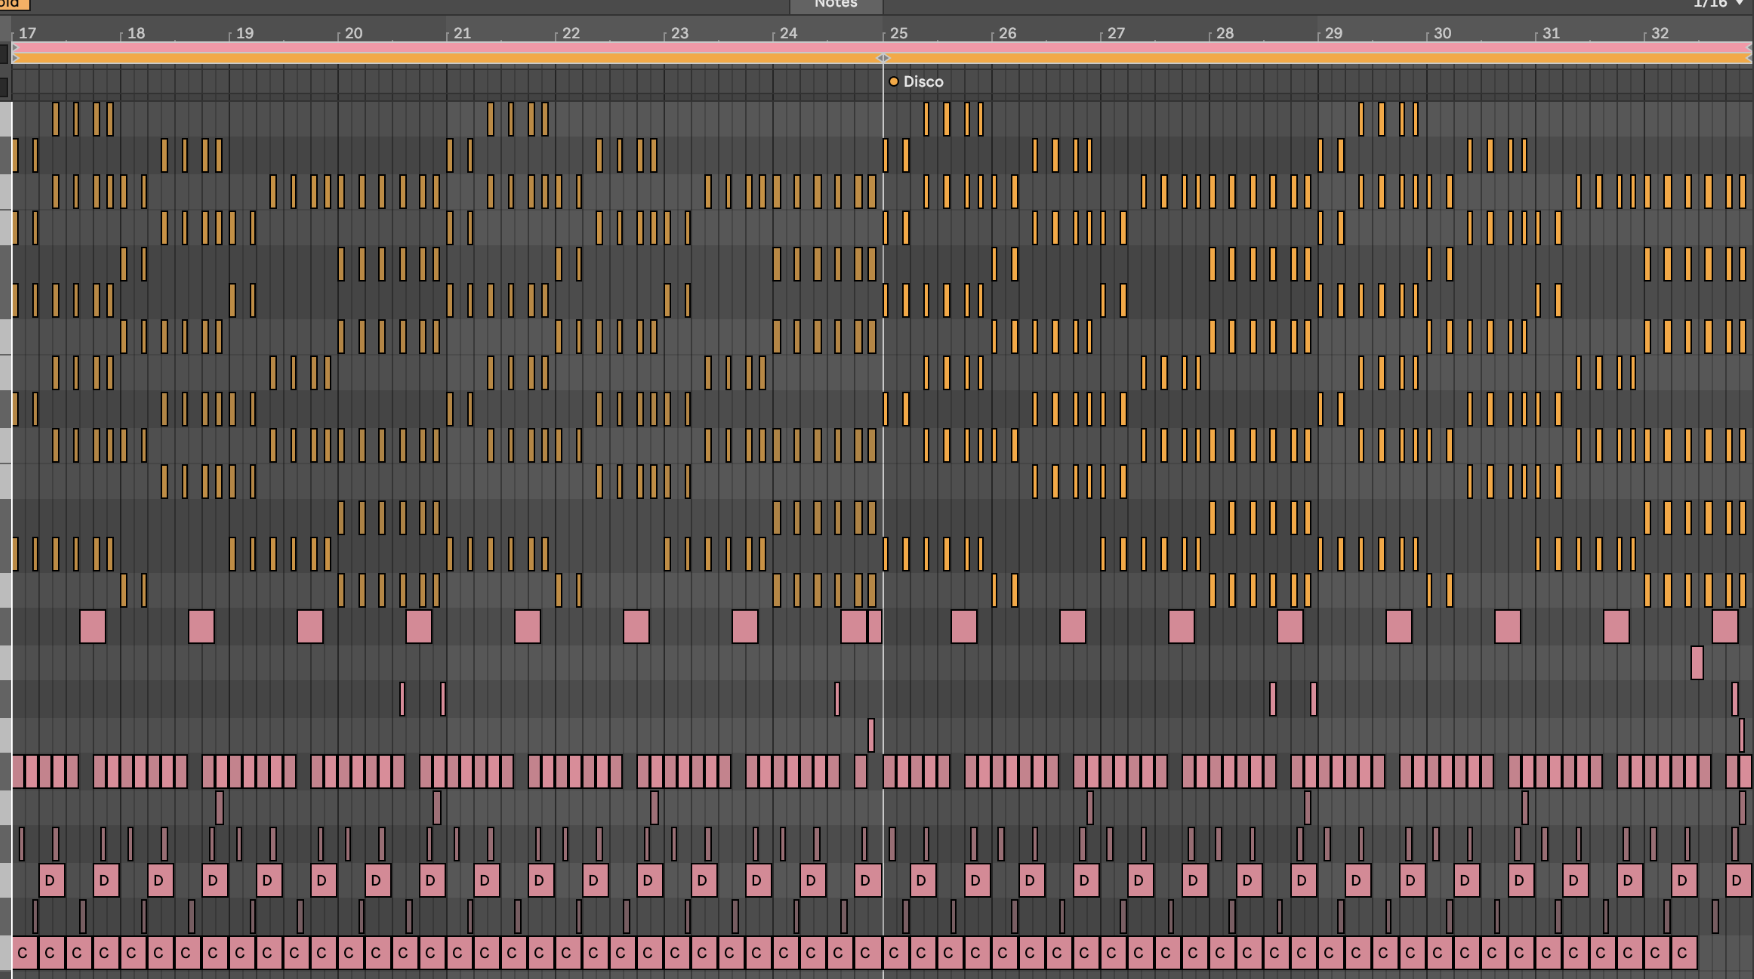
If the drum group still feels flat after these edits, add a second instance of Virtual Drummer NEON as a low-level percussion layer. Keep the programmed pattern as the main performance.
Audition other presets and kits until you find a top pattern that supports the existing groove. This adds movement while keeping the original drum programming at the front of the mix.
In this example, the Rehearsal Studio preset contributes a spacious, shuffling hi-hat pattern with a complementary rimshot and clap accent. Mute the kick and snare in the second instance, as shown in the image. Lower the remaining percussion until it sits underneath the original NEON pattern.
Step 4: Finish the Track From the Foundation
You now have the musical foundation for a complete nu disco track, with plenty of room left for production choices that make it your own. NEON has established the drum performance. From here, there are a hundred ways you could finish the track. Keep it instrumental, bring in a vocal, introduce a lead, or add small ear-candy moments around the section changes.
None of these choices needs to follow a fixed genre formula. Each part should support the established mood and help distinguish one section from the next.
The track should already work before those finishing layers are added.
This is the point of the entire process.
If you want to try the same approach, download UJAM Virtual Drummer NEON and start a fully functional seven-day trial. Load it into your DAW, choose a performance that fits the tempo, and build the track from the drums.
Stay up to date
Sign up and we’ll send you an e-mail with product news and helpful stuff every now and then. You may unsubscribe at any time.
Defy Limits
We develop software solutions that enable people to create, consume and interact with music.
About UJAM
UJAM is a German-American maker of music technology co-founded by Hans Zimmer and Pharrell Williams that develops Virtual Instrument and Effects Plug-ins. With the Plug-in series Virtual Pianist, Usynth, Groovemate, Symphonic Elements, Virtual Guitarist, Virtual Bassist, Virtual Drummer, Beatmaker and Finisher and a range of software solutions (desktop, mobile, web), UJAM helps people to make music.