Quick Production Tips that Work in Nearly Every Genre
Add these to your grab bag for use any time your progress stagnates, no matter how deep into a song you are
JULY 18TH, 2021
In this article by Harry Lodes, you’ll explore some universal tricks to speed up your production, like bringing ‘dead’ audio to life or staging your reverb:
Staging your reverbs
Many producers, especially in EDM, use reverb directly on individual tracks — and this is often plenty effective. But if things sound too dry or your sounds aren’t blending into their respective reverb zones (i.e. something just sounds ‘off’), you might need a ‘staged’ approach to reverb. This is almost necessary in orchestral music, but you can apply the principle to nearly any genre.
First, set up a few different reverbs on aux tracks at 100% wetness — these are the final stage. You can use different sizes and types, anything you think your song needs. then on the individual track level, you’ll still add reverb but only use the early reflections. Many reverbs are separated into early and late stages; think of early reflections as a ‘glow’ or small ambience around the instrument, and late reflections as the full, lush space you really want. The early stage connects sounds to the full reverb, so you’ll want to make the early reflections loud enough and tweak the size and diffusion settings until everything sounds smooth.
The reason for setting up two completely different stages is so you can send multiple instruments to the same reverb, further gluing your mix together. Be sure to disable or mute the late reflections on individual tracks so the reverb doesn’t sound artificially large or muddy. This early and late separation will give you far more control and precision whenever you need it, and you can even add extra stages if you choose: for example, sending those instruments to other early reflections to glue groups of instruments together even more before sending them to the late stage.
You don’t need to set up a complex network to create great music, but if you’re not happy with your reverb and want more definition and realism, this is an excellent way to achieve it!
Bringing ‘dead’ audio to life
There will be times when no matter what you do, certain sounds fall limp and sound weak in the mix. One of the most common reasons is a lack of rich harmonics, to which the solution is usually adding saturation — similar to distortion but much subtler. And it doesn’t usually take much.
Saturation lightly compresses the audio signal while “warming it up” overall, collectively making it “stand up” more in the mix. Too much of it can make things sound bloated, but there’s a way to get it just right:
Solo the track and turn up the drive on the saturator while decreasing the output to keep the volume exactly the same. Give it a little more juice than you think sounds good. Unsolo the track so you can hear the full mix, then close your eyes and toggle the plugin bypass until you don’t remember whether it’s on or off. Switch it back and forth and listen. Do you hear a difference? Which one sounds better? Which do you think is on vs. off?
Open your eyes and check. If it wasn’t saturated enough, push the plugin much harder (protect your ears and mind the output volume) and gradually bring the level down to a point where you’re happy, then repeat the process again. Generally, it shouldn’t sound like there’s saturation on it ... but when you take it away, something should immediately feel missing.
Delete everything??
If an audio track continues to be messy or underwhelming no matter what you do to it, save the session, do a ‘save as’ and create a new version of the session, delete every effect from your effect chain, then walk away for at least 5 minutes and start completely fresh. It’s easy to unknowingly get into a mindset where you need to ‘save’ your attempts and not waste your time — but often, you’ll save far more time by cutting your losses and starting from a clean slate.
It’s important that you do something radically different this time — in fact, start by lowering the audio track’s volume to zero and gradually increasing it to see where it fits in. Sometimes you’ll get a totally new perspective using this approach, and it’s useful to question whether you need this track at all! Sometimes the answer is to eliminate it completely and replace it with something else (or nothing at all).
If you’re unsure whether it should be there or not, try using a tremolo or volume automation plugin. There’s a certain magic to only hearing a sound part of the time as its volume rises and falls, creating a halfway point between leaving it as is and removing it completely. Plus, if you need more movement in your song overall, this is a fantastic way to quickly generate it. Then you can build a new effect chain around the tremolo to help it fit better into the mix. This fallback will likely work far more often than you’d assume!
Brutally abusing FX parameters
This one admittedly applies best to EDM and metal, but it can yield surprisingly fun results in many different genres. The basic idea is this: take any effect, tweak its knobs and faders until you comfortably know what each one does, then push anything you like to the max and see what happens. ** Always use a safety limiter when doing this, especially with feedback and gain — you want to be sure that if the volume overloads you won’t destroy your hearing! Using a limiter will ensure that you (almost) never go above 0dBFS (the maximum digital audio level); to be even safer, you can lower the limiter’s threshold to around -3dB if you have any doubts. **
Keep in mind that you should always attempt to keep the volume the same when the plugin is active vs. bypassed so you can judge the results more objectively. Louder sounds often sound fuller to our ears until we turn them down! Now that we’ve covered that, let’s check out some examples:
Take a delay (or certain reverbs) and increase the feedback to above 50% and the time to a few milliseconds. Without the feedback you won’t notice much, but with it, any audio you run through it will take on a mechanical, robotic quality. Adjusting the delay time will change the pitch of this effect, and with most DAWs it’s possible to tune it to your keyboard using MIDI assignments. Try this on mechanical sounds, synth basses, drums and anything else that comes to mind!
Next, you can min-max the settings on a distortion or saturation plugin. Turn the output way down and crank the input — make sure they perfectly mirror each other (if the input’s at the 5 o’clock position, set the output to 7 o’clock) so you don’t accidentally drive up the volume, and always lower the output before increasing the input. You’ll really get to hear the character of the plugin this way, and depending on the module you could get anything from total soup to white noise; every single distortion algorithm is different!
Another fun one: many limiters allow you to link the threshold and output — if possible, this makes the process more convenient since you always want them to be exactly equal. If not, lower the output BEFORE the threshold to avoid putting your ears at risk! Keep lowering them together to see what happens, and the audio will begin to ‘struggle’ against the limiter, becoming slightly distorted and possibly stuttery. You’re essentially clipping the audio peaks lower and lower until the waveform becomes close to a square shape, occasionally letting the original audio quality through. Test this out on tons of different source material (reverb-heavy sounds are particularly interesting)!
Quick ways to know whether a section is finished
Here’s a great stretch goal for any producer, mix engineer or arranger: make it so that avid listeners can always discover something new every time they listen to your music. This might sound impossibly difficult, but you can actually do it with simple layering. Have multiple instruments play the same or extremely similar notes, but give them different time- and volume-based effects.
One layer might just be chords with no movement; another with a different timbre and slight tremolo; another plucked layer with a subtle, lingering rhythmic delay; and another quiet layer with a short reverb at 100% wet to diffuse the sound, or something similar. Make 1 or 2 of those layers imperceptibly soft so they’re nearly impossible to hear but still contribute to the sound. Serious listeners will know there’s something more, but they’ll need to listen very closely to discover what it is.
Once you achieve this level of depth across your song, make sure that it’s always pushing forward. You might add complexity, ramp up in intensity, create a climax, and gradually subtract intensity the moment you end a heavy section ... but you always want to build anticipation for the next change, whether you’re adding or subtracting intensity. Unless you’re doing so deliberately, never lose a sense of evolution and movement — or you invite stagnation!
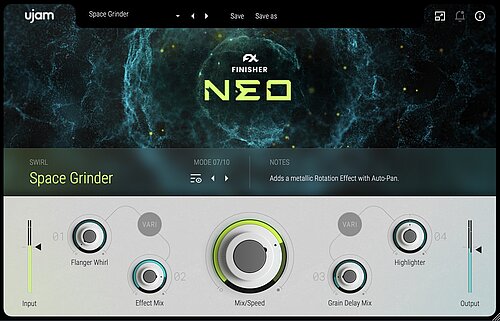
For a quick way to create movement and contrast, try out UJAM’s Finisher plugins like NEO and FLUXX. Having a multi-effect like these at your fingertips gives you plenty of ways to add variety and interest to your songs, especially when you’re in a pinch!
Wrapping up
At this point, you have tons of different tricks at your disposal to speed up your production process and spot some extremely common errors. As you put these into practice repeatedly, you’ll likely discover variations you prefer even more, and that’s great — this is all iterative, and in time you’ll come up with your own best practices and ways of diagnosing production and mixing problems in an instant.
Having repeatable processes any time you hit a snag is one of the best ways for reducing frustration and keeping you fresh throughout the process. Using tricks like these may feel slow at first, but when they’re automatic you’ll be relieved to have so many tricks up your sleeve — enjoy the process, test extensively, and always make ear protection your first priority. Listen at a low volume, use safety limiters where appropriate, and experiment to your heart’s delight!


Stay up to date
Sign up and we’ll send you an e-mail with product news and helpful stuff every now and then. You may unsubscribe at any time.
Defy Limits
We develop software solutions that enable people to create, consume and interact with music.