How to Add Polished Vocals to Any Track
Where to find vocal samples, the best go-to effects to add and how to get rid of harshness so the singer fits seamlessly into your mix.
AUGUST 9TH, 2020
Even if you typically don’t work with vocals, there are many genres that love a healthy dose of vocal samples--dubstep, drum & bass, and electro among them. And even if that’s not your scene, nearly every genre could use full vocals on a song or to. Let’s take a look at some effects and production techniques that will help you produce the best vocals on any track.
How to Chop Vocals
Many sample packs come with short, punchy samples like “hey” and “yo” (which are quite useful for producing trap music), but the real gold comes from long a capellas--30 seconds to possibly even a couple minutes. You’re working with one singer and have access to a range of different words, and you can even take specific phrases to incorporate into sections of your tracks.
An a capella is a vocal performance that has all other elements of the mix stripped away, ideally leaving you with a clean audio file that you can drop into a DAW session. Some producers will use software to strip the vocals out of popular songs and drop these into their tracks--please do not do this unless it is truly for a passion project that will never be monetized. Always make sure you’ve cleared the commercial rights to use the material first!
Which leads us to our next point...make sure the a capellas you choose are “royalty-free” (i.e. legal to use in commercial releases without attribution or payment)--if you’re buying vocal sample packs, this will nearly always be the case, but be sure to read the fine print just in case!
What Are the Best Effects for Vocals?
This is highly genre-dependent, but the challenge is usually the same--no matter how clean or grungy you need your vocals to sound, it should never get in the way of your track sounding “finished” and “polished.” Both are subjective terms, but over time you’ll develop an intuitive sense for what these sound like. So how do you polish vocals?
Let’s dive into a few audio effects that will shed a bit of light on this. Generally though, the heavy lifter of polish is EQ, which you’ll want to use for removing harsh frequencies. While every track will have specific needs, here are a few helpful guidelines to follow:
- 3kHz tends to be overpowering (you’ll often want to attenuate it).
- 7kHz often competes with electric guitars (even if you’re not using guitars, there isn’t a ton of important sonic information in this range--you may want to cut it slightly).
- 4kHz can sound harsh in excess, but don’t cut it too much--this frequency range affects how intelligible the lyrics are.
- 1kHz is the “body” of the vocals--consider attenuating this frequency range in other instruments, leaving it untouched in the vocals when possible.
- 200Hz (male) or 400Hz (female) up to around 800Hz contains the root of each note; be careful here, because while excessively cutting into this range can thin out your vocals too much, the root note doesn’t need to be strong in order for listeners to clearly hear which note is being sung; don’t be afraid to attenuate this range if need be.
Beyond EQ, if you’re looking for a simple “improve the sound of my vocals” fix, you’ll probably want to add some compression to glue the performance together, and a small amount of reverb is typically a must. Even in professional tracks where the vocals sound “dry,” you can be sure that at least a tiny bit of reverb was used. Flip back and forth between zero reverb and just a little ambience and you’ll see how big a difference it makes!
DIY Vocal Recording
If you’re recording yourself or having a singer send you vocals from their home studio, you want to make sure you’re capturing the highest-quality audio possible, especially in less-than-ideal circumstances. Here are a few high-payoff tips for making your recording process as airtight as possible, so you can create a polished final track:
- Insulate your recording area with isolation foam or a quilt--in front of and to the left & right of where the singer is standing (depending on location, you may have to tack or tape the absorbent material to a wall).
- Make sure you’re monitoring with closed-back headphones so you don’t hear any bleed in the recording.
- Have the singer stand at a consistent distance from the microphone throughout the performance--otherwise, you’ll face a lot of volume fluctuations (which prove very difficult to smooth out later).
Finishing Your Vocals
There may come a time when you feel that your vocals lack something, but you’re not sure what--they may need a combination of flanging, chorusing, saturation, delay and more. If you’re not sure where to start, the thought of building out a complex effect chain could be daunting. In this case, it’s incredibly valuable to have tools at your disposal that shortcut as much clutter and confusion as possible, at least until you’ve gotten your feet wet!
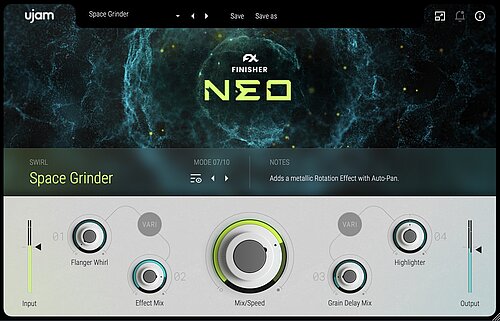
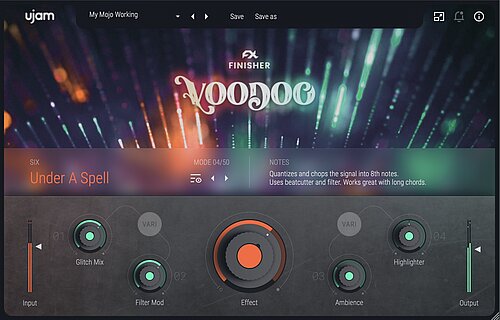
Even if you have all your basic processing dialed in perfectly, there are no vocals that can’t be improved with some creative effects (well, maybe except fully acoustic genres). For that, your fastest, simplest choice hands-down is ujam’s Finisher NEO. After you’ve settled on the right EQ, compression and reverb, you’re ready to smear, crush and liquify the vocals to the exact level that feels right to you. The Finisher Vocals preset is a great place to start--you can even control the level of detail you infuse into the finished product, ensuring that a polished vocal track is never more than a couple minor adjustments away.
What will you tackle first? Do you have a couple a capellas you want to chop? Feeling ambitious and want to record live vocals (maybe even your own)? It’s perfectly acceptable to get a sample pack of pre-chopped vocals, as long as you use them in a creative way. If you’re feeling a bit tight on inspiration, check out Free Vocals--you’ll find plenty of vocal samples to put you on the road to a finished track!

Stay up to date
Sign up and we’ll send you an e-mail with product news and helpful stuff every now and then. You may unsubscribe at any time.
Defy Limits
We develop software solutions that enable people to create, consume and interact with music.