The Ultimate Guide to Using MIDI
What it really is, how to use it, and the dangers you must avoid. These are the MIDI fundamentals!
JULY 12TH, 2020
Music production extensively uses MIDI, but for aspiring producers it often has an air of mystery surrounding its existence. We’re going to simplify MIDI down to its relevance to you as a music producer, because there are quite a few elements that you should have in mind any time you sit in front of a DAW. Refer back to this production guide whenever you need a refresher on MIDI fundamentals!
A very important note: MIDI is not audio, but rather data that can be used to control virtual instrument audio through notes and CCs (explained below in ‘Continuous Controllers’). This data can be entered manually by ‘drawing’ it into your DAW (slower but more precise) or recording it in via a MIDI keyboard, after which you can quantize each note start and end to line up with the note grid (more emphasis on real-time performance and ‘human’ quality in the performance). This experience is a little different in each DAW, and you’ll definitely want to become comfortable with note and CC entry in your DAW of choice.
The History of MIDI
Dave Smith and Chet Wood published a paper entitled Universal Synthesizer Interface in 1981, which presented the original Musical Instrument Digital Interface (MIDI) specification. In 1982, the first synthesizers to use the MIDI were released: the Roland Jupiter-8 and the Prophet 600.
On its own, MIDI cannot produce sound--it offers a way to manipulate existing synths and effects through data. A single MIDI cable can send 16 channels of information simultaneously, offering separate control over a number of different sources. Synths can be programmed with samples and sound banks and controlled via MIDI, opening up possibilities that can never be conceived by an analog synthesizer.
With the advent of DAWs, MIDI music became far more powerful--not only could you control a single instrument, but you can manipulate as many as your CPU and RAM will allow. Whether or not Smith and Wood could have predicted exactly how far audio technology would progress, there’s no doubt that MIDI has evolved far beyond its role in hardware synthesizers, and is now the de facto standard for creating digital music.
The Benefits of Using MIDI
One of MIDI’s basic functions is allowing the input of 127 possible notes at 127 potential velocities, giving you the ability to play virtually anything you like, at any volume level. The most common way to manipulate virtual instruments is to play notes via a MIDI keyboard or directly enter individual notes into the piano roll, a vertical representation of a keyboard generally used to directly manipulate note value, velocity, and length. These notes trigger samples or synthesizers that produce the corresponding pitch in the virtual instrument, allowing you to ‘play’ it as if it were a real acoustic instrument or analog synth.
There are several major benefits to using MIDI over, say, recording audio from a synthesizer or a live musician. Namely, they are:
- Convenience and portability. You don’t have to bring a large hardware unit or professional musician everywhere you go. If you like to work on a small rig on the go (perhaps a laptop + headphones + 2-octave keyboard), this is incredibly valuable.
- Money. While virtual instruments are generally not a true substitute for the real thing, there’s no denying that the more performers you have on your payroll, the more expensive it becomes to create each song. There are numerous sample libraries and physical models that allow you to approximate the sound of live instruments--ujam’s Guitarist, Bassist and Drummer are all excellent examples that you can use from the comfort of your own home!
- Tweaking a performance after it’s been recorded. This is probably the most significant advantage of MIDI over recorded audio: the ability to tweak and re-tweak a performance until you’re completely happy with it. (Of course, the obvious downside is that you can easily fall into the trap of endlessly adjusting your productions until they sound ‘perfect’--which we instinctively know to be a fallacy, but still manage to be seduced by the allure of creating the best song possible!)
What are Continuous Controllers?
The real fun begins when you incorporate knobs and faders. These can control anything from filter cutoff to reverb wet/dry to delay time, and there may be no greater joy in music production than playing with them to your heart’s content!
Continuous controllers (typically abbreviated to ‘CCs’), numbered 0 through 127, are the easiest way to directly manipulate VST knobs and faders by assigning them to physical knobs and faders on a MIDI keyboard. Have you ever gotten carried away creating filter wubs with a MIDI knob? Chances are you did so by assigning the VST setting and physical knob to the same continuous controller. Every DAW has a slightly different approach to this, but every DAW can do it (at least, any DAW that you’d actually want to use).
A few specific CCs are typically off limits as they are reserved for particular uses. The most common are: CC1 (mod wheel), CC2 (breath control), CC4 (hold pedal), CC7 (volume), CC10 (pan), CC11 (expression), and CC 64 (sustain pedal). They’re typically pre-mapped, so you can manipulate them without any setup whatsoever. In most cases you can get away with only the mod wheel and sustain pedal and making custom assignments for everything else. Just make sure not to assign parameters to any of the CCs on this list--you still have about 120 left--more than you’ll ever need--and you don’t want to confuse your DAW.
The Difference Between MIDI and Audio Effects
We briefly covered this in the ‘Background’ section, but it bears repeating--MIDI is not audio, but rather data that can be used to control virtual instrument audio through notes and CCs. But this begs the question: What about audio effects? Is MIDI useful for them as well?
The simple answer is yes--however, that answer comes with a few major reservations. MIDI notes have virtually no use relative to audio effects. CCs do, but as you become a more efficient producer, you’ll likely abandon them in 90% of cases.
Why?
Built into nearly every DAW is the ability to automate almost any parameter of any instrument or effect, which is different from CC automation. The case for parameter automation vs. CC automation is twofold: many DAWs allow you to manipulate parameter automation outside of a MIDI clip, making edits much faster and easier; also, parameters typically aren’t limited to the 127 values that constrain CCs, giving you much more detail to work with. If you’re looking to adjust reverb size or depth, instrument volume, or fx bypass (essentially the on/off button), you’ll probably tend to favor parameter automation.
That said, it’s still worth knowing that you can use CCs to play with effect parameters from your keyboard--otherwise you’ll never have the opportunity to create happy accidents!
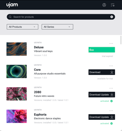
Using MIDI with ujam
One of the most fun uses of MIDI is playing with the MIDI Drag and Drop feature in ujam instruments! By dragging a pattern into a MIDI clip in your DAW, you can manipulate the timing and pitch of individual notes--try looping playback at a specific region and make small tweaks each playthrough to see what patterns and sounds you enjoy the most. This is available for drums, basses and even some guitars, and we go into much more detail in our Play the Virtual Band blog article.
Each category of ujam plugins treats MIDI a little differently--holding down a single note will give you chords with most Guitarists, basslines with most Bassists, and percussion grooves with Beatmakers and Drummers. To give yourself maximum flexibility, you’ll definitely want to play with MIDI Drag and Drop--a “good” MIDI track will differ depending on how adventurous you decide to get. You can rip the MIDI from every groove and edit to your heart’s content, but you also might enjoy picking out a couple phrases and cycling between them; in this case, you’ll probably only have a few notes in each measure. If you’re unsure, it’s typically better to start off simple and increase complexity when you need more variety.
Here are a few general guidelines that will make your life as a producer much easier:
Your MIDI notes should start and end on a straight beat (you can start on the 1,2,3 or 4 but the best start is on the first beat of a measure), and you want to ensure that your MIDI notes don’t overlap; this is important, as overlapping notes will add unintended changes to your grooves and melodies. Also ensure there are no gaps between notes to ensure seamless performance--and don’t be afraid to extend a single note over multiple notes (and even measures) if you want to extend a single groove.
Nearly every instrument and effect has parameters you can tweak as well, so how about trying out some CC automation on them? Not only does this make the process more fun, but it also adds more variety for your listeners (because there’s nothing more boring than a single loop repeating forever with zero variation!).
MIDI will be a huge part of your music production experience for the foreseeable future, and it’s worth spending the time to master its nuances. It’s a bit daunting at first, but will likely take much less time than you anticipate. Happy producing!
Stay up to date
Sign up and we’ll send you an e-mail with product news and helpful stuff every now and then. You may unsubscribe at any time.
Defy Limits
We develop software solutions that enable people to create, consume and interact with music.