The Ultimate Guide to Sound Design in Film and Game Music
Build a suspenseful, eerie or apocalyptic score, or combine this cinematic style into your tracks for dramatic effect.
NOVEMBER 22ND, 2020
Whether you are just getting into composing for film and video games, already an established composer always looking to level up, or a producer that wants to build this sound into your own tracks, this guide gives you the raw tools you need to start creating your next piece.
Record your own sounds
One of the most valuable life lessons comes from Jack Reacher: “Anything can be a weapon.” And so it is with sound design.
You find that your kitchen table lets out an odd groan when dragged across the floor. Your phone gets a call while sitting on a piece of metal and the vibration creates an unsettling resonance that sounds like a sci fi device. Maybe your refrigerator makes an odd hum (you should probably get that fixed, but be sure to record it first!).
The list goes on, and as you begin listening more carefully to your environment, you’ll start hearing more and more opportunities for excellent sound design. As often as possible, always carry a portable recorder with you to capture these moments. It may sound excessive at first, but quickly becomes addicting as you build up a library of useful material you can easily reference at a later time. The DR-40 and Zoom H1N have withstood the test of time and are affordable options for their sound quality.
If you’re on a tight budget and concerned about not having a high quality microphone to record, it’s completely acceptable to start out capturing sounds through your phone. While not ideal, it’s always better to work with what you’ve got than to let a lack of gear stop you. You can always upgrade later on! And when you begin processing the sounds, the sound will dramatically change anyway.
Process your recordings
Now that you have a few sounds recorded (soon it will be hundreds, as once you start it’s hard to stop), it’s time to get creative. It’s important to have as many raw recordings available to you as possible, because if you feel something isn’t working, you won’t feel as obligated to use it. Unfortunately, not all source material is going to be usable; record as much as you can to give yourself a mathematical advantage.
We go into basic effect types in detail in our article, How to Choose an Effect for Music Production. If you’d like a refresher on getting a more professional mix, you should definitely start there. But for the purposes of sound design, you’ll deliberately use effects in ways they weren’t meant to be.
For example, you typically want to be gentle with EQ. But for creating an angry mechanical bass drone slathered with reverb? Try a harsh low pass filter and draw a dramatic automation curve in your DAW. Because of the huge volume fluctuations you’ve now created, you need to tame things with a compressor set to a low threshold and ultra high ratio. Once the contours of the sound are just right, slap on a gritty distortion plugin that adds a ton of heat. You may even want to add another aggressive low pass filter at the end and automate that to make things sound more “alive.”
Don’t worry if this sounds a bit foreign to you right now; given time, you’ll get a feel for what to experiment with and learn the ins and outs of your plugins. A good general principle to follow with sound design is to add a highly intense effect, followed by one designed to bring things back under control. This constant balancing act is an art, one you’ll grow more comfortable with as you practice.
For recorded sounds, there are a number of quick ways to make them sound creepier, bigger, gentler or way more destructive. You can try:
- Pitching them down in a sampler
- Adding an impossibly large reverb
- Running them through a granular synthesizer to create a pad texture
- Different types of distortion plugins for gritter, angrier or darker effects
- Other creative effects like comb and allpass filtering, ultra short delays with a bit of feedback, flanging and phasing (Serum’s FX section offers high quality options for all of these)
Create suspenseful synth patterns
Cinematic music heavily relies on repeating synth patterns, typically through arpeggiators and step sequencers. These provide a way of automating multiple effects at once and giving the illusion that a synth is a living, breathing creature (or at least a mechanical one). Adding in a pattern of repeating 8th or even 16th notes allows you to create tension and movement and control subtle nuances that build up the sound over time. Hans Zimmer masterfully incorporates this into many of his film scores like Inception and The Dark Knight if you want to hear examples of this approach in action.
These often fall into the categories of bass drones and chords. Bass drones can withstand heavier distortion and more dramatic effects overall, while chords usually benefit from more reverb and subtler effects. You’re entirely free to break these rules, but when you’re unsure, they’re a good starting point.
Since we’ve been discussing automation so thoroughly, here are some examples of things you can automate in your synth patterns:
- Filter: cutoff frequency, resonance
- Distortion (these options may not all be available on every plugin): type / profile, filtering, character, gain (be careful, automating that carelessly could hurt your ears)
- Reverb: pre-delay, size, density, duration
- Wavetable: position, modulator (some synths offer options to bend and edit the wavetable, such as Serum and Massive), phase
The list goes on, and there are a number of ways to automate these parameters--the most accessible ways are via an LFO or a MIDI Continuous Controller. Here’s a video that goes into some creative routing possibilities without getting lost in the weeds:
Repeated synth patterns are one of the most foolproof ways to control the pacing of a cue or track, owing to their combination of rhythm and effects automated over time. If you’re looking to build suspense or even drag out a certain part of a song to fit a film or video game sequence (or simply because it sounds cool), start with a synth pattern and see how far you can take it!
Design ambient pads
If you want to add light chords in the background or even create a nontonal soundscape from the recordings you’ve added to your library, there are a few tools that can turn almost anything into a rich ambient texture you can layer into your music or add as a standalone addition:
- Granular synthesis. This is a highly complex topic, but in essence it involves chopping up a sound into thousands of tiny pieces and blending them together. The result is typically floaty and atmospheric, especially when layered with copious amounts of reverb. Padshop and Omnisphere 2 are industry standards in granular processing, and produce delightful surprises when you experiment with them.
- Delay. If you add multiple delay lines together, you’ll get an even more immersive effect that makes it sound like the source material is repeating into a distant void, which is a nice trick for creating a beautiful cinematic texture.
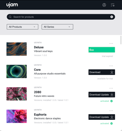
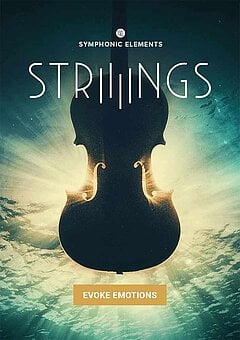
- Reverb. In this case, we’re not talking about the type that you throw onto a track to make it sound like it was recorded in a specific room. There are specific plugins that are designed to create ethereal and infinite spaces; the Step Into My Lab preset from UJAM’s FLUXX is an excellent way to accomplish this (FLUXX also adds in a bit of granular processing), and you can try it out here for free.
The goal here is to create something that sounds never ending, that the listeners can lose themselves in, and possesses a ton of fine details that add interest. You can take the above effects much further by automating parameters on each of your effects, creating something that constantly morphs and shifts over time.
Build a huge cinematic orchestra
No discussion of film and game music sound design would be complete without referencing the orchestra! There are a number of excellent books on orchestration, so we’ll merely go into a few helpful production techniques here.
You can think of the orchestra in four primary sections: strings, brass, woodwinds and percussion. For our purposes, woodwinds are largely an accent and you shouldn’t feel obligated to include them. And as a producer, you’re probably familiar with different kinds of beats already, so we won’t touch on percussion (but if you want a refresher, feel free to check out How to Build a Groove). As a general rule, cinematic percussion tends to focus on electronic drum kits and epically large acoustic kits; it’s rare you’ll use standard orchestral production for electronic or hybrid film and video game music.
That leaves strings and brass! Strings are excellent for carrying the melody and adding soft accents, while horns are typically used for intense hits and risers. Even just a little touch of strings added in the background will add an incredible level of depth to your composition, and there’s a way to create full string ensemble hits and chords if you’re not an expert orchestrator.
Sequencing virtual strings can take years to master, and we wanted to cut the learning curve down to size. So UJAM took matters into its own hands.
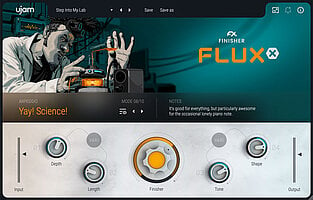
UJAM’s newest plugin, STRIIIINGS, allows you to add a full string section to any score or song, and is perfect for producers looking to get their feet wet in cinematic scoring for film and games. The strings were recorded in Hans Zimmer’s studio by Boris Salchow, an LA-based film and game composer, and come from decades of careful selection for the greatest cinematic power.
Most of Hans’ libraries require a multiple-computer setup and would max out the RAM on a standard computer, but Boris condensed the best aspects of a complex library into a single plugin that runs smoothly on any DAW. In Boris Salchow, we found the perfect producer – a guy who both understands the “everyman” and – being an acclaimed film and game composer himself – is perfectly capable of taming a super-complex system like Hans’

Stay up to date
Sign up and we’ll send you an e-mail with product news and helpful stuff every now and then. You may unsubscribe at any time.
Defy Limits
We develop software solutions that enable people to create, consume and interact with music.