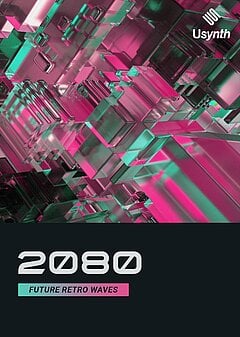
Create Synthwave Leads With Usynth 2080
Get the most out of every option and setting in the UI, creating pro-level synthwave songs faster than ever.
JANUARY 2ND, 2022
Read this article and learn how you can produce your next synthwave song in a fast and easy way, with Usynth 2080:
Building melodies from chords
With synthwave in particular, it’s helpful to get the chord progression in place first and even get some of the basic synth chords going in the background — this is because some of the most suitable melodies come from outlining and using the chords directly in your lead lines. You’ll find many of your best ideas come from slight modifications of basic arpeggios and ostinatos, so having the chords done already will dramatically reduce the time it takes to arrive at ideas you’re happy with!
Another benefit of starting with chords is that you can harmonize very easily in thirds, sixths, fourths and alternations between all of them, ensuring you don’t have to redo your work later — plus, harmonizing allows you to do less work and finish songs faster. Once you have a melody, you can repeat it and add a harmony line below it, and in no time you have double the length of material finished. From there, you can simply add some minor layers in the background to polish it up, then you’re good to go!
2080 makes this even easier with its Sequencer section on the left hand side — rather than the visual system most step sequencers and arpeggiators offer (in which you often have to create your own patterns from scratch), all the heavy lifting has been removed for you. Instead, select one of the presets from the Melodies, Sequences, Arpeggios and Chords options, tweak the rate and see what happens! You can also use this to create countermelodies and background ostinatos to fill out the space in the mix and write the melody more freely if you choose; you might even find that melodic ideas suddenly pop out to you while listening to the patterns coming from your Sequencer settings!
Getting the synthwave sound
While there’s no one sound that defines synthwave leads more than anything else, you’ll discover some commonalities even if you listen to a wide variety of different artists. One of the big ones we covered in our sister article, How to Make Synthwave Atmospheres is the use of longer-than-normal note releases, particularly combined with reverb (under subheading “The role of reverb”). One way to quickly try out different sounds with 2080 is to change the Fast/Slow setting under the Synthesizer section — this will simultaneously adjust the length of both the volume envelope’s attack and release, morphing between a gradual shape and a sharp, articulate one. Generally, with faster tempos and shorter notes, you’ll fare better with Fast/Slow settings closer to the left extreme.
While this gradual sound is common, it’s certainly not your only option. Select the Atlantis setting under Synthesizer and Keys, then play with the Staccato setting (this works best when you set the Fast/Slow knob all the way to the left). You can use this to control the amount of ‘pluckiness’ in your lead lines, which when paired with the Dark/Bright setting will give you an incredible range of timbres from the same basic sound. You can use this to dramatically cut down on the amount of time your sound design process occupies, but there’s perhaps an even more clever use: when you want to build into the next section, start with full left Fast/Slow and Staccato, and gradually automate the Staccato knob to the right over the course of 4 bars or so; it will feel as though the sound is ‘opening up,’ which helps to create the impression that everything is changing in unison when you add other elements such as risers and filter modulation.
When synthwave leads sound huge, one of the contributing factors is often octave doubling: giving the melody to the same synth or a new one and separating them by an octave or two. You can hear this effect once again in the Atlantis setting by tweaking the Sub Octave setting below this section. Setting it dead center will split the sound evenly between the two layers and give you a thick, full-range lead that reaches from the low mids all the way up to the high frequencies, providing increased presence immediately. This effect becomes even more dramatic when you manipulate the Character setting and widen the octave spread and significantly alter the timbre along with it!
Additional shaping options
Anytime you need to add dimension to your lead, pitch- and delay-related options are typically a good bet, particularly vibrato and chorus. Depending on which Synthesizer option you choose in 2080, you may be able to create this right from within the same section, such as via the Dramatic setting below the Alexandria Synthesizer option. Whenever you’re not sure whether to add this extra richness, here’s a valuable guideline to follow: the slower the melody, the more likely you’ll want to add these additional effects; on the other hand, you should avoid it for fast passages as the pitch variations will muddy the lead line and make the entire song harder to mix.
If you enjoy getting super aggressive with your leads and venture more into the realm of bass music, try considering your bass and melody to be one and the same in certain sections — you can even open a song like this, as Dance With the Dead does with the song Riot at 0:16 in. Doubled octaves are almost necessary to gain the power to sell this as an arranging and production technique, so in 2080 you may want to find a Synthesizer setting with a Sub Octave option as mentioned above; you can also opt to add another track with an additional 2080, though if you do it all from within a single instance of 2080, you can pass everything through the same Finisher settings and glue everything together without relying too heavily on external effects (though, of course, you can also add a standalone Finisher into your post-2080 effect chain on all your lead layers together).
This segues perfectly into the last major point of focus...
Effects and processing
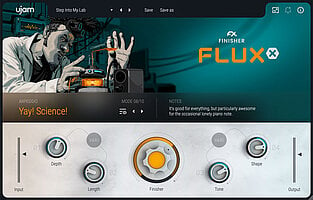
All of 2080’s major processing happens in the Finisher section on the far right of the UI — this is where you’ll find the most common effects like different types of compression, distortion, phasing, flanging, etc. (for more info on the major types of audio effect, check out our article, The Ultimate Guide to Audio Effects). However, that’s just the Single section ... the real fun begins when you open up the Dual and Quadro dropdowns and explore the plethora of multi-effects you now have available to you. Let’s highlight a few options you can have a ton of fun with...
If you’re creating floaty, dreamy leads or otherwise want to create a dramatic ambience around your lead lines, give the Moonstorm Finisher setting a try — it’s glistening, ‘infinite’ reverb you can re-pitch and modify in other ways to instantly create new soundscapes from virtually anything Synthesizer settings you feed into it. To accentuate this ambience to the max, set Pitching, Spectrum and Aura to 100% left with Whirl and the overall Effect wetness to 100% right. From there, add in a few notes and stop ... then listen as the soundscape grows, mellows out and gradually fades to nothing; the shorter and more staccato the notes, the greater the textural detail in the final result.
Depending on how intense you want your leads to get, you may also want to try out the Total Destruction setting, which gives you a low pass filter plus individual Overdrive, Distortion and Saturation controls. You can choose which ones you like and in what amounts, or you can dial them all up at once to slam them with added harmonics and grunginess. This will be overkill in most situations, though you can roll it back to your liking (or embrace the result in all its destructive glory).
There are plenty more options, but this will give you an idea of a few possibilities available to you in the Finisher section alone — top it off with the Delay and Ambience sections, and you can create virtually any lead you choose!
Wrapping up
Usynth 2080 makes it faster and easier than ever to create a diverse range of synthwave leads, even if you typically find yourself being restricted by the complexity of other synthesizers available to you. One of the most powerful aspects of Usynth is that you can have very little knowledge of digital audio theory or sound design principles and still get a fantastic-sounding result with little to no hassle. It’s helpful to know the theory of course, and if you want to find your way around synthesizers with far greater ease, check out our Guide to Learning Any Software Synth Quickly — though with Usynth, this is not a prerequisite by any means!
If you spend any length of time creating synthwave, 2080 will make your workflow easier than ever. Whether you want a hand with sound design and don’t want to spend all of your free time in and out of tutorials, or you’re constantly on the hunt for new ways to release songs at a faster pace than ever before without sacrificing quality, 2080 is an invaluable asset to add to your arsenal. Try it out, play with the presets and see what inspiration you discover as you explore the new options available to you. Happy producing!
If you are courious about our new Usynth head over to our Youtube channel and watch the product trailers!

Stay up to date
Sign up and we’ll send you an e-mail with product news and helpful stuff every now and then. You may unsubscribe at any time.
Defy Limits
We develop software solutions that enable people to create, consume and interact with music.